In the last couple of months, I have been evaluating the possibilities to recreate flight instruments and other cockpit parts for a Junkers Ju 388 cockpit in an accurate manner. Of course, most of the individual flight instruments may still be obtained as genuine items via the usual sources. However, prices are already horrendous for the rarer pieces. By contrast, larger structures such as instrument panels, consoles or control panels are de facto no longer available.
Of course, static reproductions of instrument panels are fascinating in their own right, but for a professional systems engineer working in the field of Human Factors Engineering, a dynamic simulation of cockpit procedures is way more attractive. Most of the simple electrical indicators can be made operational again with little effort, because these instruments usually feature little more technical sophistication than a moving coil mechanism and a voltage divider. This technology is sufficiently robust for instruments and sensors to work without problems after more than 70 years. As an example, the temperature indicator Fl 20349 can be operated using merely the respective sensor and an off-the-shelf 24 V power supply.
In the following, I intend to give a brief overview of the possibilities to reproduce spare parts for historic aircraft instruments.
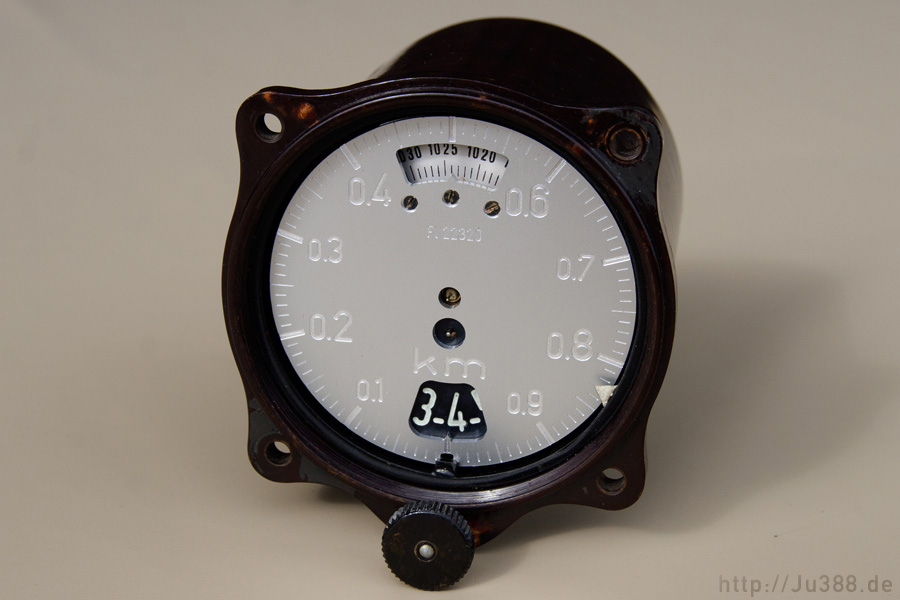
The above phot shows a genuine reproduction of an instrument dial for the so-called Fein-Grob-Höhenmesser Fl 22320 (R. Fuess, Berlin-Steglitz), a barometric altimeter of the sensitive type. Its dial is essentially identical to the altimeter Fl 22322 used in the Ju 388. In order to demonstrate the precision and dimensional accuracy of the dial, it has been installed in an original altimeter.
In order to reproduce the ciphers and tick marks, which are embossed in the original, substantial effort was necessary to create vector graphics suitable for engraving an aluminum plate. Extensive work is required because the ciphers used are generally similar to the widely used old DIN 1451 Mittelschrift font, but exhibit such significant deviations from presently available True Type fonts that each individual cipher had to be re-created eventually.
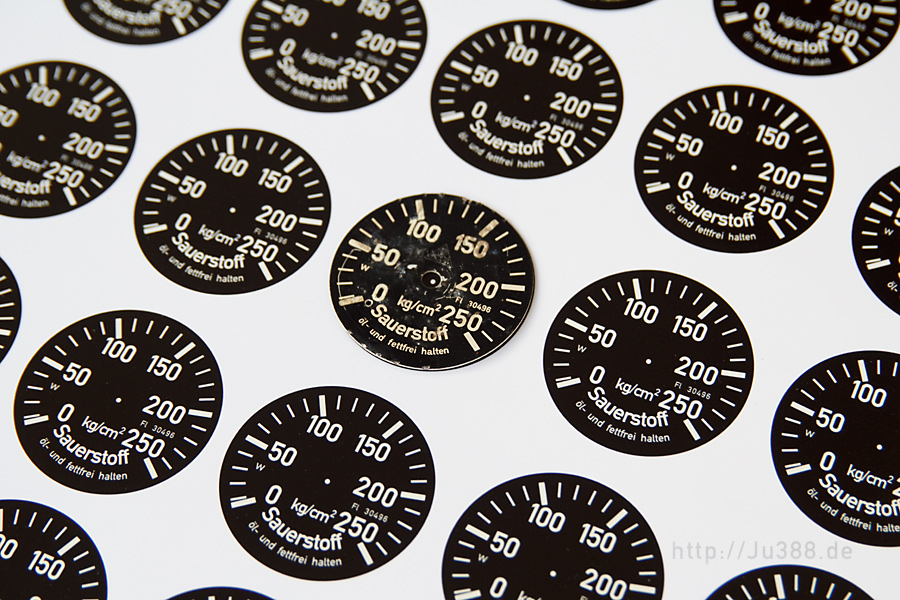
For those instrument dials devoid of embossed or engraved elements, a first step towards an affordable, simple reproduction is a matt photo printout. The result is shown in the photo below for the oxygen pressure indicator Fl 30496 (Schäffer und Budenberg, Magdeburg). As the damaged original instrument dial placed on the printout for comparison demonstrated, the result is surprisingly good. The main challenges in this context are exact knowledge of the size of the photo paper, as well as an accurate production of the colours used in the original dial.
Until recently, the only possibility to reproduce instrument casings consisted in the various second cast techniques, resulting in (partial) epoxy resin casts. However, the increasing emergence of 3D printing services enables an alternative but time-consuming approach that I want to sketch briefly.
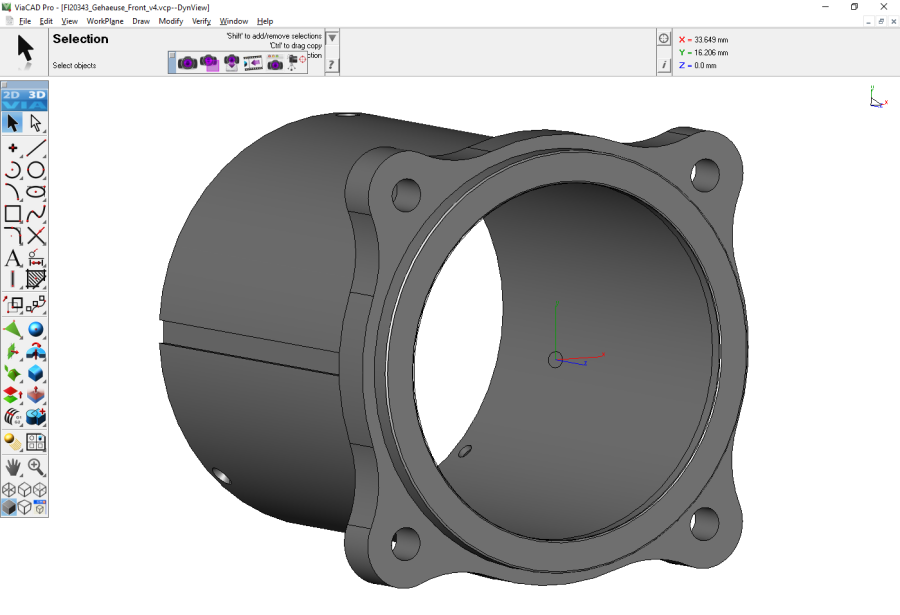
All that is required is a 3D-capable CAD software such as ViaCAD, and ideally an original casing as well as a calliper. With sufficient patience, one can thus create a 3D model of the instrument casing to be reproduced in several hours, ideally during dark winter evenings. In the image below, the instrument casing of the temperature indicator Fl 20343 (Hartmann und Braun, Frankfurt) was reconstructed based on an original casing unearthed in Russia.
The completed 3D model can now be uploaded to the servers of one of the typical 3D printing services such as i.materialise. It may have to be converted to one of the usual formats such as .stl. Most 3D printing services already offer a wide range of materials.
Laser-sintered polyamide seems to be an ideal choice for a first test shot due to the relatively low cost. The prototype thus created may subsequently be used for fine-tuning and adaptations of the 3D model. However, it appears that the more expensive "Prime Gray" is an ideal candidate for the reproduction of bakelite casings, because it has a similar densitiy and results in an optical quality almost equal to that of injection moulding.
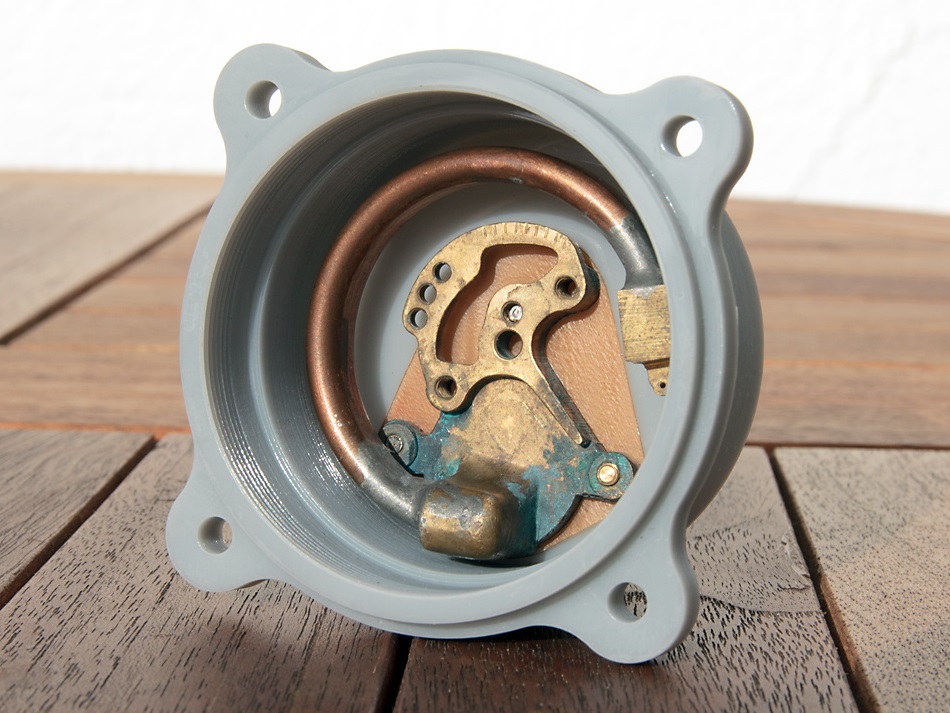
The photo above shows an as yet unpainted instrument casing for the already mentioned oxygen pressure indicator Fl 30496 printed in this material. Interior parts of an original gauge have been installed, and both dimensional accuracy and stability are excellent.
Of course, the method described above is not limited to the reproduction of complete instrument casings, but also suited for the production of spare parts. I have owned an incomplete Fl 22320 altimeter for some years, from which one of the previous owners removed two of the lugs for installation in the instrument panel. Using 3D printing, I could now finally create fitting spare parts that can in principle be used on any large instrument casing (79 mm diameter).

Part of my instrument casings reconstructed in 3D and further spare parts are available directly from i.materialise, where interested parties can directly order them.
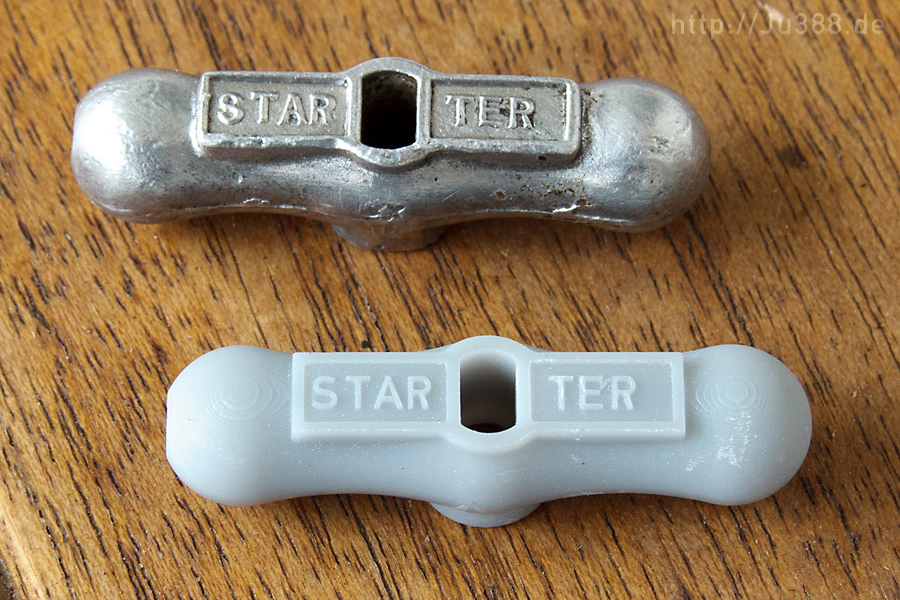
Handels and control elements can also be reproduced using CAD software or other applications for 3D modelling. In the following, the starter handle Fl 21214-2, which is essentially no longer available as an original part, is used as an example.
Depending on individual budget and the intended application of the reproduction, this starter handle can be 3D printed either in metal or in the substantially cheaper plastic variant. However, most printing services offer only brass, bronze or precious metals.
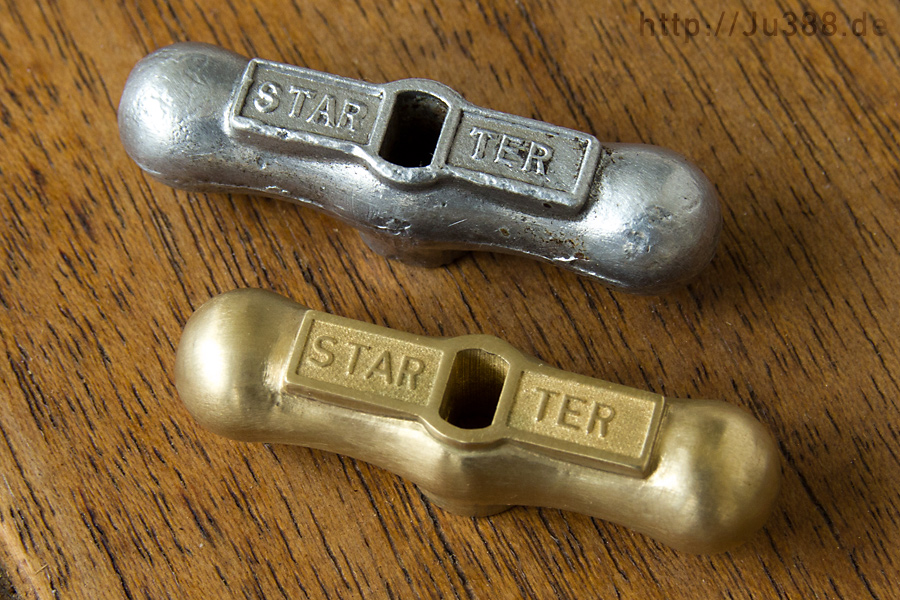
The comparison with the aged and slightly battered original in the background gives an impressive demonstration of the current capabilities of 3D printing. For the handle printed in plastic (Prime Gray), only a minimum sanding effort is required for perfection.
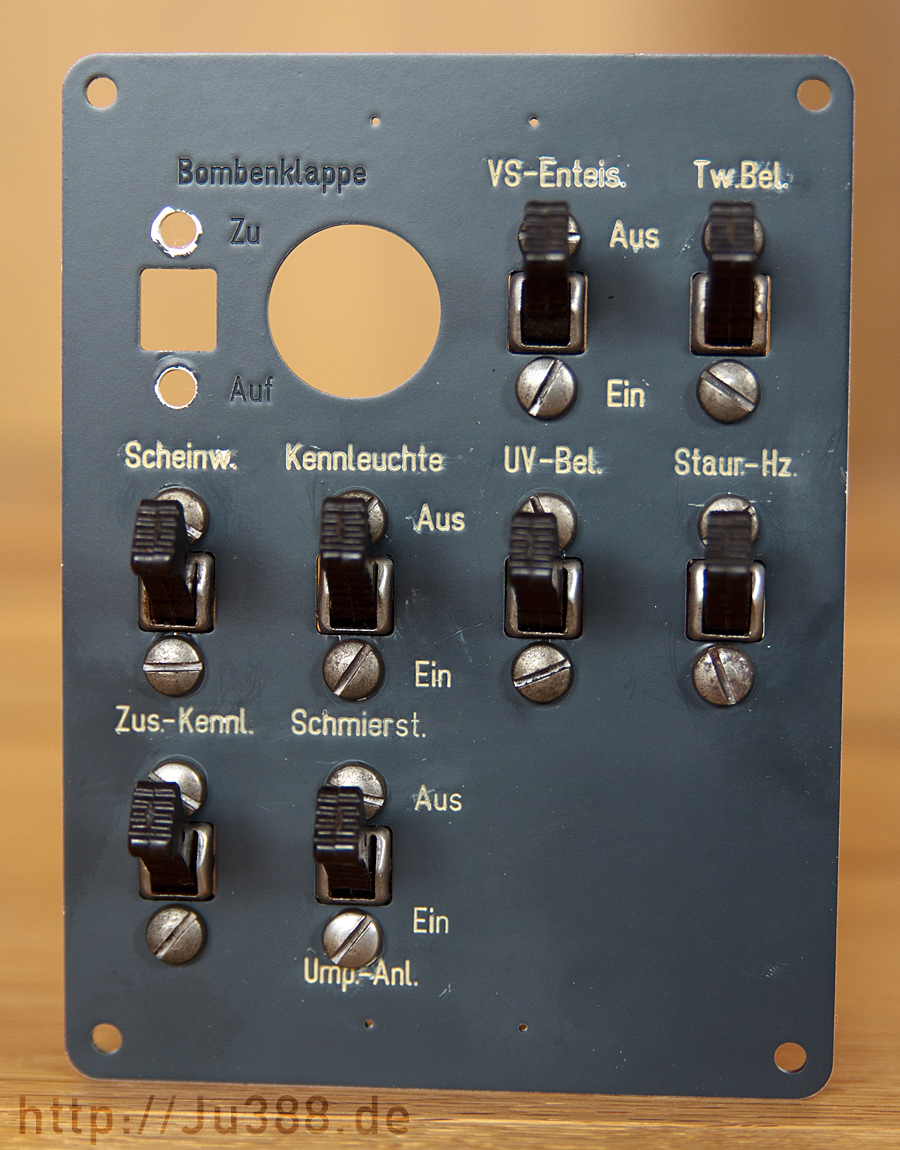
Below is a photo of a first test assembly of a Ju 388 L-1 control panel (V1020, to the right of the fuel pump switches on the right hand side cockpit wall) for the control of, among others, landing lights, navigation lights, and pitot heating. The reproduction technologies for the panel itself are essentially the same as for the instrument dials (see above). The switches and screws are genuine parts.
One of the most noteworthy aspects about this panel is that it is identical to the one on the Ju 388 K-0 and the never realised Ju 388 K-1 bomber series. Accordingly, the openings for the bomb bay door switch and the corresponding indicator are present, but will eventually be fitted with blind covers. Likewise, the associated engraving has not been laid out.
To give you an impression of a genuine WW2 Luftwaffe cockpit indicator, I have made a very brief video featuring a still operational original Zwölflampengerät Fl 32532, which was used on some Ju 388 prototype aircraft in this version. Since I am neither filmmaker nor an actor, I do apologise for the quality...